WHITE CHOCOLATE CHEESECAKE

I must confess that I definitely prefer dark chocolate, but I can’t stop baking this special cheesecake! She’s so delicate and sincere; the white chocolate adds a different flavour without overpowering the cheesecake. She will literally melt in your mouth.

INGREDIENTS

 CRUST (Tip 1)
 125g butter, room temperature
 50g castor sugar
 1 egg
 175g cake flour
 2.5ml baking powder
 Pinch of salt
  
 CHEESECAKE
 300g white chocolate
 3 × 230g cream cheese tubs
 1 cup castor sugar
 2 tbsp cake flour
 4 large eggs
 1 tsp lemon zest
 1 tbsp vanilla essence
 ½ cup cream
 ½ tsp salt 

METHOD

 CRUST
 1. Prepare a springform cake tin (23-25cm) with non-stick spray.
 2. In a medium bowl, cream the butter and castor sugar until light and fluffy.
 3. Add the egg and mix until well combined. 
 4. Sift together the cake flour, baking powder and salt in a separate bowl.
 5. Add the flour mixture, one tablespoon at a time, to the butter mixture until well combined. 
 6. Spread the mixture onto the base and sides of the prepared cake tin and place in the fridge for 30   
    minutes to firm up. 
  
 CHEESECAKE
 1. Place the white chocolate in a microwave bowl and heat in short bursts of 30 seconds each,   
    stirring every time until the chocolate has just melted. Put aside to cool down. 
 2. Preheat the oven to 200°C and place the oven rack in the middle of the oven.
 3. In a large mixing bowl, whisk the cream cheese until light and fluffy (5-10 min).
 4. Add the castor sugar and cake flour and whisk for another 3 minutes until well combined.
 5. Add the eggs, one at a time, mixing well after each addition.
 6. Add the rest of the ingredients, including the white chocolate and mix until well combined and 
    smooth. 
 7. Pour the cheesecake mixture over the prepared crust into your cake tin and bake for 15 minutes.
 8. Reduce the heat to 120°C and bake for another 45 minutes. 
 9. Turn the oven off and leave the cheesecake inside of the oven to cool down (3-4 hours). DO NOT 
    open the oven door.
 10. Allow the cheesecake to rest and set in the fridge for a few hours or overnight before serving 
    (Tip 2). 
TIPS
 1. You are more than welcome to make a simple cookie crust as well.
 2. The cheesecake is delicious with or without a top layer. I covered it with a thin layer of white 
   chocolate cream cheese icing that I had left from the previous cake.  

COFFEE ICE CREAM CAKE

I always claim that it’s never too hot for coffee or too cold for ice cream. My love for both of these inspired this cake and she’s perfect for a summer dessert!
P.s You can easily modify the ice cream layers to incorporate your favourite flavours.

INGREDIENTS

 CAKE (Tip 1)
 ½ cup cacao powder
 1 tbsp coffee powder
 1 cup boiling water
 ½ cup sunflower/canola oil
 1 tbsp vanilla essence
 4 large eggs, separated
 1 ½ cup castor sugar
 1 ¾ cup cake flour
 1 tbsp baking powder
 ½ tsp salt
 ICE CREAM (Tip 2)
 2 litre vanilla ice cream
 1 tbsp coffee powder
 1 tbsp boiling water
 1 tbsp vanilla essence
 TOP LAYER (GANACHE)
 150g dark chocolate, finely chopped/grated 
 ½ cup cream 

METHOD

 CAKE 
 1. Preheat the oven to 180°C and place the oven rack in the middle.
 2. Prepare two round cake tins (20-23cm) with baking paper and non-stick spray.
 3. In a medium jug, combine the cacao, coffee and boiling water until well combined and smooth. 
 4. Add the oil and vanilla to the cacao mixture and combine. Set aside to cool down.
 4. In a large mixing bowl, whisk together the egg yolks with an electric mixer (Tip 3). 
 5. Gradually add the castor sugar, while whisking, until light and fluffy.
 6. Add the cacao mixture to the egg mixture and whisk until well combined.
 7. Sift the dry ingredients over the egg mixture and mix until just combined.
 8. In a medium glass bowl, whisk the egg whites with a clean electric mixer until soft peaks form.   
    Gently fold the egg whites into the cake batter until well combined.
 9. Divide the cake batter between the prepared cake tins by weight.
 10. Bake the cakes in the middle of the oven for 25-30 minutes until a cake tester comes out clean  
     when inserted in the middle of the cake (Tip 4).
 11. Allow the cakes to cool down for 5 minutes before loosening the sides and demoulding onto cooling 
     racks. Allow the cakes to cool down completely before assembling the cake. 
 ICE CREAM 
 1. Remove the ice cream from the freezer to soften just a little.
 2. In a coffee mug, mix the coffee, boiling water and vanilla essence until the coffee has dissolved. 
 3. Spoon all the ice cream into a large glass bowl and stir the coffee mixture through the ice cream 
    until everything is well combined. 
 4. Place the ice cream back into the freezer if you still have preparations to do before assembling 
    the cake or if the mixture became too soft while mixing.
 ASSEMBLE
 1. Cut the domes off the cakes to level the cakes before cutting each layer through the middle with a 
    bread knife to produce 4 cake layers (Tip 5). 
 2. Clean your cake tins and place a cake layer on the bottom of the tin. Then spoon ½ of the ice 
    cream or a third of the ice cream onto the cake layer (depending on Tip 5). 
 3. Top the ice cream layer with another cake layer, gently cover with plastic wrap and immediately 
    place the cake into the freezer to set (3-4 hours/overnight).
 4. Turn the cake out onto your cake stand and allow the cake to soften just a little before cutting 
    and serving.  
 TOP LAYER (Tip 6)
 1. Place the grated chocolate in a medium glass bowl.
 2. Heat the cream in the microwave in 30 second bursts until it just starts to boil.
 3. Immediately pour the heated cream over the chocolate and allow to stand for 1 minute. Using a 
    wooden spoon, stir this mixture with small circular movements in the middle of the bowl until 
    smooth and glossy.
 4. Allow the mixture to cool down until it has set to a thick pouring consistency. 
 5. You can pour this top layer over the cooled cake at any time. Simply remove the plastic wrap, 
    slowly pour the chocolate over and return the cake to the freezer. Once the chocolate has set on 
    top, you can cover the cake again with plastic wrap. 
You can also wait to serve the cake before pouring the top layer over the cake. The leftover cake can then be refrozen with the chocolate layer on top.  
TIPS
 1. If you are short on time, you can use an easy mix chocolate cake. I would recommend Ina Paarman’s. 
    Appreciate this tip because I won’t suggest using easy mixes again anytime soon. 
 2. You can combine any flavours/liqueurs/chocolates/nuts/sweets into this ice cream layers to make 
    the cake your own!
 3. I would recommend whisking the egg yolks and sugar with a stand mixer if you have one.
 4. If the cake tester comes out with very wet cake batter, bake the cakes for another 5 minutes and 
    test again. Be careful to not overbake the cakes.
 5. You can decide if you want to assemble the cakes separately using one divided cake (thus two cake 
    layers) with a centre of ice cream, or you can use all 4 cake layers with 3 ice cream centres to 
    present a large cake instead of 2 smaller cakes. 
 6. You can use any chocolate sauce of your choice for the top layer. 

COCONUT & WHITE CHOCOLATE CAKE

What a celebratory cake she is!
I had the privilege to put a simple wedding dress on this girl and she absolutely wowed the crowd! I’ve always been a coconut fan, but this cake made me rediscover the beauty of white chocolate and the way it melts in your mouth. Don’t let this one to slide you by – bake her!

INGREDIENTS

 CAKE 
 ½ cup boiling water
 100g white chocolate
 185g butter
 1 ½ cup castor sugar
 4 large eggs, separated
 1 tbsp vanilla essence
 1 tbsp baking powder
 1 tsp salt
 2 ½ cup cake flour
 1 cup coconut yogurt/cultured buttermilk
 1 cup desiccated coconut, lightly toasted
  
 ICING
 200g white chocolate, melted
 100g butter, softened
 400g icing sugar, sifted
 1 tbsp vanilla essence
 230g cream cheese 

METHOD

 CAKE 
 1. Prepare two cake tins (21-23cm) with baking paper and non-stick spray.
 2. Preheat the oven to 180°C and place the oven rack in the middle.
 3. In a medium glass bowl, add the boiling water and white chocolate and stir until melted and   smooth. Set aside to cool down.
 4. In a large mixing bowl, cream the butter and sugar until light and fluffy. 
 5. Separate the eggs and place the egg whites in a separate glass bowl to whisk later. 
 6. Add the egg yolks one by one to the sugar and butter mixture while whisking. 
 7. Add the melted chocolate and the vanilla to the butter mixture as well. 
 8. In a medium bowl, sift together the dry ingredients and add to the butter mixture, alternating with the yogurt/buttermilk until everything is well combined. 
 9. Stir the coconut into the batter and mix until just combined.
 10. Whisk the eggs whites with an electric whisk until soft peaks form. Gently fold the egg whites into the batter until just combined. 
 11. Divide the batter between the cake tins and bake them in the middle of the oven for 25-30 minutes (Tip 1). 
 12. Remove the cakes from the oven and allow to cool down for 5 minutes before loosening the sides and demoulding the cakes onto cooling racks. 
 13. Once the cakes are completely cooled down, ice them and store the cake in an airtight container at room temperature (Tip 2).
  
 ICING
 1. Melt the white chocolate in a small glass bowl in the microwave in bursts of 30 seconds. Stir after each burst to prevent the chocolate from burning. Heat the chocolate only until it has just melted. 
 2. In a medium bowl, cream the butter with an electric mixer until light, fluffy and pale. This is the most important time-consuming step.
 3. Add the icing sugar, one tablespoon at a time, until well combined and creamy (Tip 3).
 4. Add the cream cheese, vanilla and white chocolate. Mix until just combined. 
TIPS
 1. Divide the batter between the cake tins by weight to ensure even layered and baked cakes. 
 2. Butter cakes should be enjoyed at room temperature. If the icing seems a bit runny, place the decorated cake into your fridge and take it out once the icing has set and then keep it at room temperature. 
 3. If the mixture is too dry to cream properly, add the vanilla essence and a tablespoon or two of the cream cheese to help the creaming process. Once the butter and sugar is then creamed to the desired texture, you can add the rest of the ingredients.  

PECAN NUT CHEESECAKE

I always claim that less is more with cheesecakes, but this lady made me think twice! The pecan nut caramel layer elevates this cake without overpowering the cheesecake. I can promise you she’s worth your time!

INGREDIENTS

 CRUST (Tip 1)
 125g butter, room temperature
 50g castor sugar
 1 egg
 175g cake flour
 2.5ml baking powder
 Pinch of salt
 BOTTOM LAYER
 1 cup castor sugar
 ½ cup golden syrup
 80g butter, melted
 2 eggs, lightly whisked
 1 ½ cups pecan nuts, roughly chopped
 1 tsp vanilla essence
 ¼ tsp salt
 CHEESECAKE
 3 × 230g cream cheese tubs
 1 cup castor sugar
 2 tbsp cake flour
 3 large eggs
 1 tsp lemon zest
 1 tbsp vanilla essence
 ½ cup cream
 ½ tsp salt
 TOP LAYER (OPTIONAL)
 50g butter
 ½ cup castor sugar
 1 tsp cinnamon
 1 tsp vanilla essence
 ¼ cup cream
 1 cup pecan nuts, roughly chopped and roasted with a pinch of salt 

METHOD

CRUST
 1. Prepare a springform cake tin (23-25cm) with non-stick spray
 2. In a medium bowl, cream the butter and castor sugar until light and fluffy.
 3. Add the egg and mix until well combined. 
 4. Sift together the cake flour, baking powder and salt in a separate bowl.
 5. Add the flour mixture, one tablespoon at a time, to the butter mixture until well combined. 
 6. Spread the mixture onto the base and sides of the prepared cake tin and put in the fridge for 1 hour to firm up. 
 BOTTOM LAYER
 1. In a medium pot, mix all the ingredients and allow to melt over medium-high heat (Tip 2). Stir frequently. 
 2. When the mixture starts to boil, reduce the heat, and allow the mixture to simmer until reduced and thick (±10 min). 
 3. Once you are satisfied with your caramel, remove the pot from the heat and allow to cool down in the fridge (Tip 3). 
 4. Pour the mixture onto the crust in the cake tin to cover the bottom of the crust.
 CHEESECAKE
 1. Preheat the oven to 220°C and place the oven rack in the middle of the oven. 
 2. In a large mixing bowl, whisk the cream cheese until light and fluffy (5-10 min).
 3. Add the castor sugar and cake flour and whisk for another 3 minutes until well combined.
 4. Add the eggs, one at a time, mixing well after each addition.
 5. Add the rest of the ingredients and mix until well combined and smooth. 
 6. Pour the cheesecake mixture over the pecan nut layer into the cake tin.
 7. Bake the cake for 10 minutes at 220°C. Reduce the heat to 110°C and bake for another 30 minutes. 
 8. Turn off the oven and leave the cheesecake to cool down in the oven with the door closed for 2-3 hours. 
 9. Remove the cheesecake from the oven, cover with plastic wrap and refrigerate overnight to set completely (Tip 4 & 5). 
 TOP LAYER (Tip 6) 
 1. In a small pot, melt together the butter and sugar over low heat. 
 2 Allow to boil for 3-5 minutes until lightly caramelized. Remove the pot from the heat.
 3. Add the rest of the ingredients and mix well. 
 4. Allow to cool down to room temperature before pouring the top layer over the cheesecake.  
TIPS
 1. You are more than welcome to make a simple cookie crust as well. 
 2. Make sure you mix the eggs with the other ingredients before heating to prevent scrambled eggs. 
 3. You don’t want the caramel to firm up completely, but you also don’t want the caramel to melt your crust when poured into the cake tin. Once you can easily hold your finger in the caramel without burning, it’s ready to be used (±15 min in fridge).
 4. Refrigerate the cake in the cake tin and only demould the cake the next day. To do this, carefully loosen the sides of the cake with a butter knife before unclipping the springform cake tin. 
 5. Remove the cake from the fridge 2-3 hours before serving to ensure that the cheesecake is enjoyed at room temperature. 
 6. I would recommend making the top layer only the next day, before serving the cake, to prevent the caramel to become too sticky in the fridge overnight.  

GINGERBREAD MAN CAKE

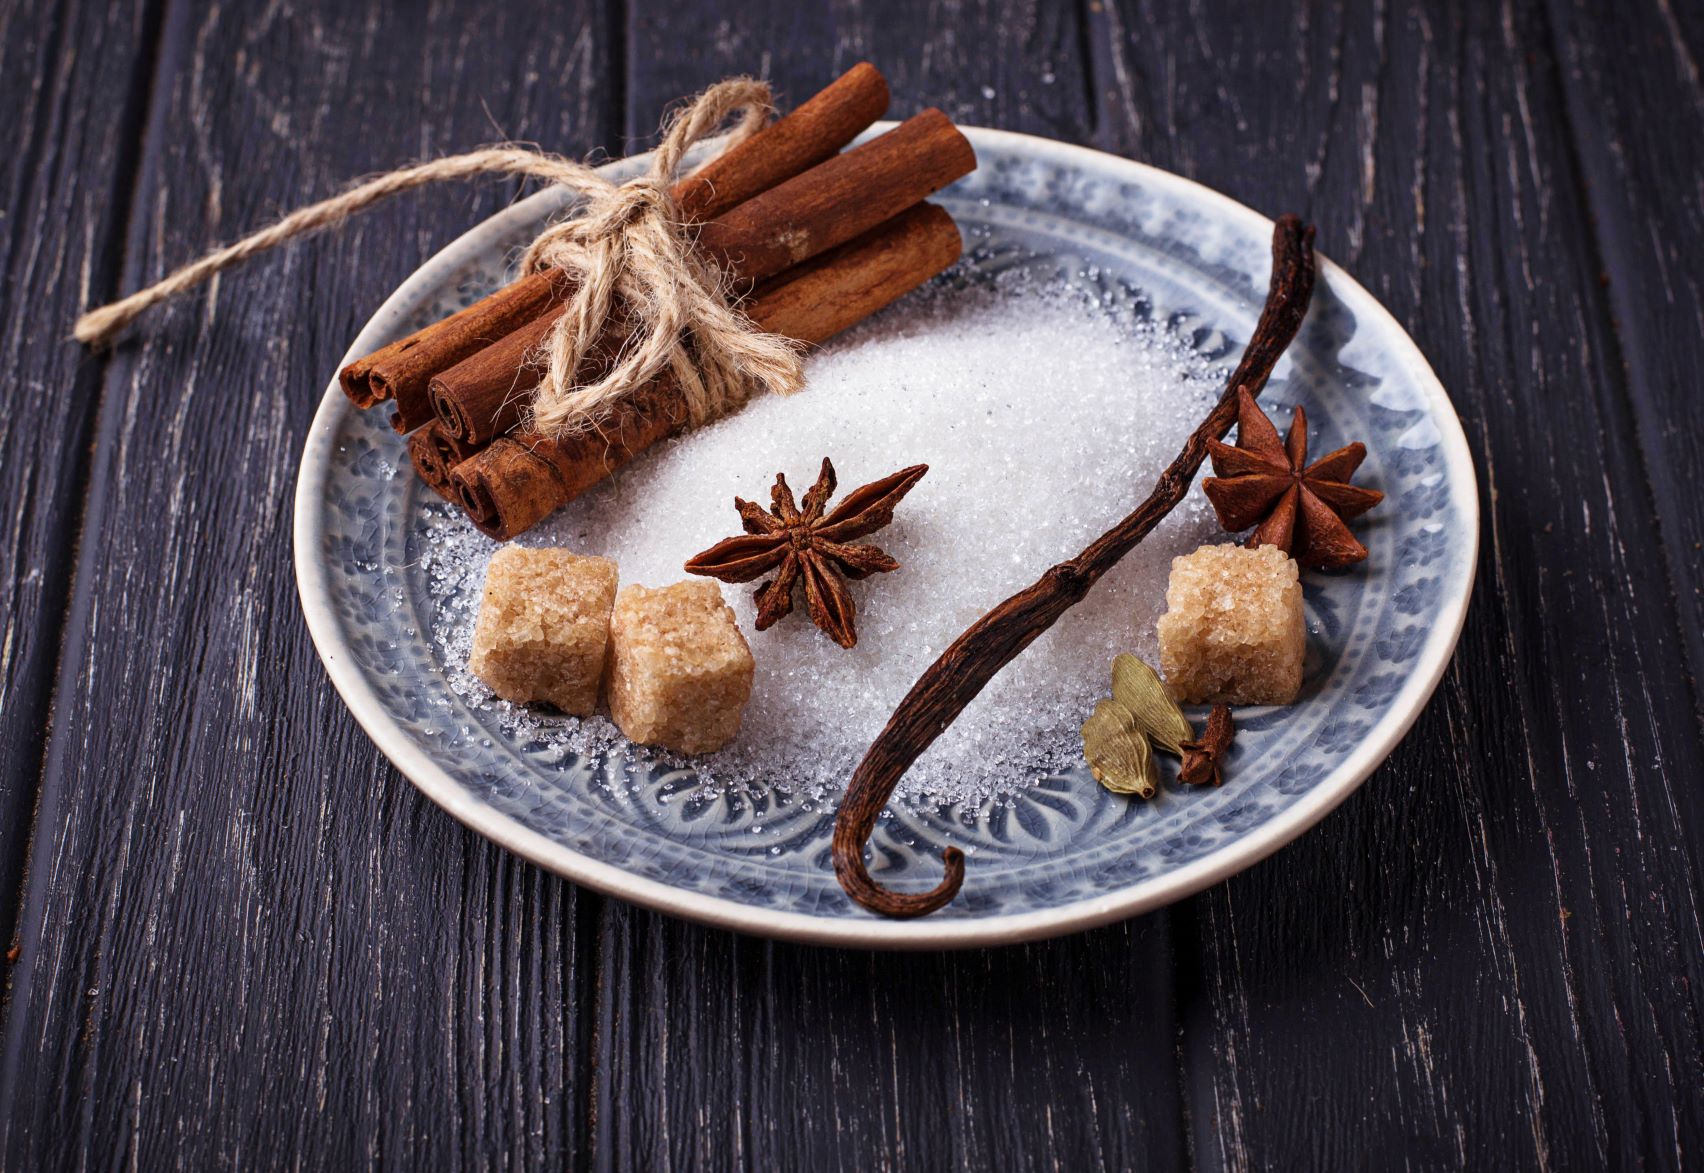
With the festive season ahead, I couldn’t resist playing around with these flavours!
I must confess; she’s not necessarily everyone’s cup of tea, although she might surprise you with her gentle and warm flavours. The lemon cream cheese icing cuts through the sweet and sharpness of the ginger. Prepare yourself for some serious flavours!
(The gingerbread cookie recipe is also added)

RECIPE

CAKE (1 LARGE LAYERED CAKE)
250g butter, softened
1 cup brown sugar
3 large/XL eggs
1 cup golden syrup
1 tbsp vanilla essence
3 cups cake flour
1 tsp mixed spice
1 tsp cinnamon
1 tsp fine ginger
½ tsp salt
2 tsp bicarbonate of soda
1 cup buttermilk/Amazi
50g dried ginger slices, finely chopped
 
ICING
200g butter, softened
400g icing sugar, sifted
230-250g cream cheese
2 tsp lemon juice
½ tsp fine ginger (optional)
pinch of salt
 
GINGER COOKIE (±30 COOKIES)
125g butter, softened
½ cup golden syrup
2 tbsp milk
1 tbsp vanilla essence
1 large egg
1 cup castor sugar
3 cups cake flour
1 tsp bicarbonate of soda
1 tsp mixed spice
1 tsp cinnamon
1 tbsp fine ginger
½ tsp salt

METHOD

CAKE
1. Preheat the oven to 170°C and position the oven rack in the middle of the oven.
2. Prepare two round cake tins (21-23cm) with baking paper and non-stick spray.
3. In a large mixing bowl, cream together the butter and sugar until light and fluffy (Tip 1).
4. Add the eggs, one at a time, mixing well after each addition (Tip 2).
5. Add the golden syrup and mix until well combined.
6. Sift together all the dry ingredients over the wet ingredients and mix well.
7. Add the buttermilk and chopped ginger and mix until just combined.
8. Divide the cake batter between the prepared cake tins and bake for 35-40 minutes (Tip 3).
9. Once the cake tester comes out clean when inserted in the middle of the cakes, remove the cakes from the oven and allow to rest for 5 minutes before loosening the sides and demoulding the cakes onto cooling racks.
10. Allow the cakes to cool down completely before icing (Tip 4).

ICING
1. In a medium bowl, cream the butter with an electric mixer until light, fluffy and pale. This is the most time-consuming step.
2. Add the icing sugar, one tablespoon at a time, until well combined and creamy.
3. Add the cream cheese, lemon juice, fine ginger and salt. Mix until just combined.
 
GINGER COOKIE
1. In a large mixing bowl, whisk together the butter, golden syrup, milk and egg until well combined and smooth.
2. Sift together the rest of the ingredients over the wet ingredients and whisk until a soft, smooth dough forms (Tip 5).
3. Cover the dough with plastic wrap and allow to rest in the fridge for 1 hour to firm up.
4. Preheat the oven to 180°C and prepare baking trays with non-stick spray.
5. Prepare your work surface with cake flour and roll the cooled dough out (2-3mm).
6. Use cookie cutters of your choice to cut through the dough and place the cookies on the prepared baking trays (Tip 6).
7. Bake one tray of cookies at a time in the middle of the oven for 7-8minutes.
8. Allow the baked cookies to cool on wire racks and store in an airtight container once completely cooled down.
TIPS
1. This is a very important step to ensure a light, soft textured cake. I would recommend using a stand mixer with the balloon whisk attachment.
2. If using a stand mixer, I would recommend you switch to the paddle attachment before adding the rest of your ingredients to prevent over mixing of the cake batter.
3. To ensure even baked and even layered cakes, divide the batter into the cake tins by weight.
4. I halved each cake layer to create this 4-layered cake. If you don’t feel comfortable doing this, you can use the extra icing to ice the sides of the cake.
5. If the dough seems a bit dry, don’t add extra moisture; rather mix it with your hands to form the dough. If the dough is too soft and wet, it will be difficult to work with.
6. Place the cookies about 1cm apart on the baking trays. After cutting the cookies out, recollect the excess dough to form a ball and roll it out again to not waste any dough. 

PEANUT BUTTER & SALTED CARAMEL CAKE

She’s filled with humility and kindness. May she leave you licking your fingers like a child scraping the last bit of peanut butter out of the jar.

INGREDIENTS

CAKE
6 large eggs
400g castor sugar
1 ¼ cup milk
150g butter
3 tbsp peanut butter
1 tbsp vanilla essence
350g cake flour (2 ½ - 2 ¾ cups) 
1 tsp salt
1 tbsp baking powder
 
ICING
80-100g smooth peanut butter
230g cream cheese (1 tub)
1 tbsp vanilla essence
300g icing sugar
¼ tsp salt
 
SALTED CARAMEL
1 tin caramel treat
1 tsp coarse salt

METHOD

CAKE
1. Prepare 2 round cake tins (21-23cm) with baking paper and non-stick spray.
2. Preheat your oven to 170°C and position the oven rack in the middle of the oven.
3. In a large mixing bowl, using an electric mixer, whisk together the eggs and sugar until pale and fluffy (±5min).
4. Place the milk and butter into a microwave jug and heat the mixture until the butter is melted. Stir regularly.
5. Add the peanut butter and vanilla to the milk mixture and stir until dissolved.
6. Sift together the dry ingredients in a separate bowl.
7. Fold in a third of the dry ingredients into the egg and sugar mixture. Fold in half of the milk mixture, then a third of the dry ingredients, the other half of the milk and end off with the remaining dry ingredients.
8. Divide the cake batter between the cake tins (Tip 1).
9. Bake the cakes for 30-35 minutes or until a cake tester comes out clean when inserted in the middle of the cake (Tip 2).
10. Remove the cakes from the oven and allow to cool down in the cake tins for 10 minutes before loosening the sides and demoulding onto cooling racks.
 
ICING
1. In a medium bowl, using an electric mixer, whisk together the peanut butter, cream cheese and vanilla until smooth.
2. Sift the icing sugar and salt over the mixture and whisk until well combined and lump free.
 
SALTED CARAMEL
1. In a medium bowl, mix the caramel and salt until smooth and spreadable.
 
ASSEMBLE
1. Once the cakes are cooled, you can cut each layer in half.
2. Place your first cake layer on your cake board and top with ½ of the salted caramel.
3. Top with the second layer of cake and top with ½ of the icing.
4. Top with the third layer of cake and add the remaining caramel.
5. Finish off with the last cake layer and icing.
TIPS
1. To get even layered cakes, divide the batter by weight into the cake tins.
2. If there’s only a few crumbs on the cake tester, you can remove the cakes from the oven to prevent overbaking the cakes. If there’s still wet batter on the cake tester, bake the cakes for another 3-5 minutes and test again.

CINNABON CAKE

She’s a bit of a dark horse. What appears to be a vanilla cake, is spiced up with a rich cinnamon swirl throughout the cake. Her mysteriousness won’t disappoint!

INGREDIENTS

CAKE
3 cups cake flour
1 cup white sugar
4 tsp baking powder
¼ tsp salt
1 tbsp vanilla essence
1 ½ cup milk
3 large eggs
1/3 cup butter, melted

CINNAMON SWIRL
1 cup butter, softened
1 cup brown sugar
2 tbsp cake flour
1 tbsp cinnamon
1tsp mixed spice
¼ tsp salt

ICING
230g (1 tub) cream cheese
1 tbsp vanilla essence
100g icing sugar, sifted
pinch of salt

METHOD

CAKE
1. Preheat the oven to 160°C and position the oven rack in the middle of the oven.
2. Prepare a large bundt cake tin with non-stick spray. Spray vigorously.
3. In a large mixing bowl, sift together all the dry ingredients.
4. Make a well in the middle of the dry ingredients and add all the wet ingredients.
5. Using an electric mixer, whisk together the batter until well combined and smooth. Set aside.

CINNAMON SWIRL
1. In a medium bowl, using an electric mixer, whisk together the butter and sugar until light and fluffy (±5min).
2. Add the rest of the ingredients and whisk until well combined and smooth.

ASSEMBLE
1. Pour 2/3 of the cake batter into the prepared cake tin.
2. Spoon the cinnamon swirl mixture over the cake batter and gently swirl the mixture with a knife to create a marble effect.
3. Pour the rest of the cake batter into the cake tin to cover the batter completely.
4. Bake the cake for 40-45 minutes until a toothpick/cake tester comes out nearly clean when inserted in the middle of the cake (Tip 1).
5. Remove the baked cake from the oven and allow to rest for 10 minutes before gently loosening the sides of the cake with a butter knife.
6. Carefully demould the cake onto a cooling rack and allow to cool down completely before icing the cake.

ICING
1. In a medium bowl, using an electric mixer, whisk the cream cheese and vanilla until soft (±5min).
2. Add the rest of the ingredients and whisk until smooth and shiny.
3. Top the cooled cake with the icing and store in an airtight container at room temperature.
TIPS
1. The cinnamon swirl mixture will remain a bit wet and sticky, even when the cake is ready and fully baked. Therefore, the cake should be tested by checking if the plain cake mixture is baked. Be careful to not overbake the cake.

CARROT CAKE CHEESECAKE

Two of my favourites, in one! What better combination can you ask for to celebrate springtime? She’s strong with her flavours, yet soft in appearance; she fearlessly wears her flower crown.

INGREDIENTS

CHEESECAKE
2 × 230g tubs cream cheese
½ cup (125ml) castor sugar
1 tbsp (15ml) cake flour
2 large eggs
½ cup (125ml) sour cream/plain yogurt
1 tbsp (15ml) lemon juice and zest
1 tbsp (15ml) vanilla essence
pinch of salt

CARROT CAKE
1 cup (250ml) brown sugar
2 large eggs
100g butter, melted
¼ cup (60ml) milk
1 tbsp (15ml) vanilla essence
1 ½ cup (375ml) cake flour
2 tsp (10ml) baking powder
½ tsp (2,5ml) bicarbonate of soda
1 tsp (5ml) cinnamon
1 tsp (5ml) mixed spice
½ tsp (2,5ml) salt
1 cup (250ml) carrots, grated (±2 large carrots)

TOPPING (OPTIONAL)
50g butter, softened
150g icing sugar, sifted
100g cream cheese, room temperature
2 tsp (10ml) vanilla essence

METHOD

CHEESECAKE
1. Prepare a springform cake tin (23cm) with non-stick spray.
2. Preheat the oven to 160°C and place the oven rack in the middle of the oven.
3. In a large mixing bowl, using an electric mixer, whisk the cream cheese until soft.
4. Add the castor sugar and cake flour to the cream cheese and whisk until well combined and smooth.
5. Add the eggs one at a time, mixing until just combined after each addition.
6. Add the rest of the ingredients and mix until just combined. Set aside.

CARROT CAKE
1. In a large mixing bowl, using an electric mixer, cream together the sugar and eggs until light and pale.
2. Add the melted butter, milk and vanilla and mix well.
3. Sift together all the dry ingredients over the wet ingredients and fold in the mixture until just combined.
4. Add the carrots and gently mix until well combined.

ASSEMBLE
1. Pour 1 ½ cups of carrot cake mixture into the prepared cake tin and spread evenly to cover the bottom of the cake tin.
2. Gently pour a third of the cheesecake mixture over the carrot cake layer.
3. Spoon the remaining carrot cake mixture over the cheesecake layer (Tip 1).
4. Pour the rest of the cheesecake mixture into the pan to cover the cake layers completely.
5. Bake the cake for 50-60 minutes, until the centre jiggles only slightly when you move the cake tin (Tip 2).
6. Remove the cake from the oven and allow to cool down in the cake tin; placed on a wire rack.
7. Refrigerate the cooled cake for an hour before demoulding and adding the topping (Tip 3).

TOPPING
1. In a medium bowl, using an electric mixer, whisk the butter until pale and fluffy (±5min).
2. Gradually add the icing sugar and whisk together until well combined (±5min).
3. Add the cream cheese and vanilla essence and mix until smooth.
4. Spread the cream cheese topping over the cooled cake and top with fresh flowers or roasted nuts.
5. Store the cake in an airtight container at room temperature.
TIPS 
1. The Carrot cake mixture is heavier than the cheesecake mixture and will therefore “sink” into the cheesecake mixture. Do not worry about this, it’s supposed to happen.
2. The cake shouldn’t be completely set or tested with a pin to see if it’s baked. The cake will further set when it rests in the hot cake tin, as well as in the fridge. You don’t want to overbake the cake.
Also, the cake will fall in a bit when you remove it from the oven, as a baked cheesecake does.
3. Before demoulding the cake, make sure to gently loosen the sides with a butter knife first to prevent the sides of the cake from sticking to the cake tin.

CHOCOLATE MOUSSE CAKE

She is so mature, yet a bit of a people-pleaser. She’s more than capable to make any cholate lover’s heart skip a beat.

INGREDIENTS

CAKE (Tip 1)
375ml/250g cake flour
250ml/120g cacao powder
40ml cornflour
5ml baking powder
5ml bicarbonate of soda
5ml salt
10ml vanilla essence
250g butter, room temperature (Tip 2)
500g castor sugar
5 large eggs
300ml buttermilk
 
MOUSSE
40ml water
15ml gelatine powder
2,5ml salt
5ml coffee powder
5ml vanilla essence
15ml hot water
450ml milk
450g dark chocolate, chopped
750ml cream
 
GANACHE
300ml cream
300g dark chocolate, finely chopped/grated

METHOD

CAKE
1. Preheat the oven to 170°C and position the oven racks in the middle of the oven.
2. Prepare two round cake tins (21-23cm) with baking paper and non-stick spray (Tip 3).
3. In a medium bowl, sift together all the dry ingredients.
4. In a large bowl, with an electric mixer, cream together the vanilla and butter until softened (±5 minutes).
5.  Gradually add the castor sugar to the butter mixture and cream until light and fluffy (5-10 minutes).
6. Add the eggs one by one and scrape the mixture off the sides of the mixing bowl if necessary (Tip 4).
7. Add a third of the dry ingredients to the mixing bowl and mix on a low speed. Add half of the buttermilk and mix until combined. Add another third of the dry ingredients, then the other half of the buttermilk and end off with the last third of the dry ingredients.
8. Make sure that the mixture is well combined, especially the batter at the bottom of the mixing bowl. Be careful to not overmix your cake batter.
9. Divide the batter between your cake tins and bake for 40-50 minutes in the middle of the oven.
10. The cake are done when a cake tester/wooden pick comes out clean when inserted in the middle of the cake. If the cake is still a bit raw, bake for another 5 minutes and test again.
11. Allow the cakes to rest for 5 minutes before loosening the sides and demoulding them onto cooling racks. Allow cake to cool face down.
12. Once the cakes are completely cold, using a sharp bread/serrated knife, cut each cake in two or three layers before assembling (Tip 5).
 
MOUSSE
1. In a small glass bowl, add the water and sprinkle the gelatine over the water. Allow to soak for 2 minutes.
2. In a coffee mug, dissolve the salt and coffee in the 15ml hot water. Add the vanilla and set aside.
3. In a medium saucepan, heat the milk on the stovetop until boiling point.
4. Remove the milk from the heat and add the gelatine. Stir until the gelatine is dissolved.
5. Place the chopped chocolate in a large glass bowl and pour the hot milk over the chocolate. Gently stir until the chocolate is melted.
6. Add the coffee mixture to the chocolate mixture and allow to cool down until the mixture starts to set on the sides of the bowl.
7. In a large glass bowl, with an electric mixer, whisk the cream until soft peaks form. Gently fold the cooled chocolate mixture into the cream until well combined.
 
ASSEMBLY
1. In a clean springform cake tin, place the first layer of cake inside (Tip 6).
2. Carefully place the first cake layer into the prepared cake tin and top with mousse (Tip 7). Repeat this layering process and end off with a layer of cake; NOT mousse.
3. Carefully cover the cake with plastic wrap and place in the freezer (yes, not the fridge) until needed.
 
GANACHE
1. In a medium glass bowl, add the chopped/grated chocolate.
2. In a medium saucepan, heat the cream on the stovetop until boiling point. Immediately remove from the heat and pour the cream over the chocolate.
3. Allow the mixture to rest for a minute before stirring. Use a wooden spoon and make small circles in the middle of the glass bowl until the mixture is fully combined, melted and shiny.
4. Remove the frozen cake from the freezer and place it onto a cooling rack that is placed onto a baking tray.
5. Pour the chocolate ganache over the cake, allowing the ganache to cover the sides of the cake as well (Tip 8).
6. Place the cake into the fridge to defrost for about 2-3 hours before serving.
7. After serving the cake, it can be stored in an airtight container in the fridge, not at room temperature.
TIPS
1. The cake and mousse should be prepared a day before serving. The ganache is prepared on the day of serving the cake. You can even prepare the cake up to 1-2 weeks before serving.
2. It is very important to cream the butter at room temperature; cold or melted butter will not provide the desired consistency. Cold butter can be softened in the microwave in 10 second bursts.
3. If you have 3 cake tins of the same size, I would recommend dividing the cake batter between those 3 tins instead of 2 to minimize the effort to cut the cakes afterwards.
4. When using an electric stand mixer, I switch from the balloon whisk to the paddle attachment when adding the eggs. This will prevent the mixture from splitting.
5. Thin cake layers are preferable when layering the cakes with the mousse. This way the cakes won’t press the mousse out because of its weight. The ratio of your cake and mousse layers will also be more even. If you baked three cakes, you only need to halve the cakes. If you baked two cake, challenge yourself to cut each layer into three to four separate layers.  
6. While assembling the cake, cover the outside of the cake tin with tinfoil to support the cake layers that are higher than the sides of the cake tin.
It will be difficult to get the completed cake out of a regular cake tin, therefore a springform cake tin is recommended for assembling the cake. If you don’t have the correct size springform cake tin, assemble the cake on your preferred platform (plate/cake stand/wooden platter) and create a “mould” out of tinfoil to support the structure of the cake, until the mousse is set.
7. I would recommend weighing out the mousse in the number of layers that you’ll need to ensure even layering of the cake.
8. If the ganache is too runny, wait 10-15 minutes for the ganache to firm up a bit and try again.

ORANGE & CHAI-SPICED CAKE

She’s sweet and spicy; basically fearless. A beautiful winter combination and definitely one of my favourite creations thus far!

INGREDIENTS

CAKE
280g butter, softened
500ml castor sugar
2 oranges, juice and zest
6 large eggs
200ml plain yogurt
10ml vanilla essence
750ml cake flour
5ml bicarbonate of soda
10ml baking powder
2,5ml salt
5ml cinnamon
5ml mixed spice (ginger, gloves, nutmeg)
2ml cardamom spice (Tip 1)

ORANGE SYRUP
250ml orange juice
1 lemon, juice and zest
12,5ml orange zest
125ml sugar
2,5 ml salt

CREAM CHEESE ICING
200g butter, softened
400g icing sugar, sifted
230g cream cheese
5ml vanilla essence
Pinch of salt
30ml instant chai latte/black chai tea (optional)

METHOD

CAKE
1. Preheat the oven to 170°C.
2. Prepare two round cake tins (21-23cm) with baking paper and non-stick spray.
3. In a large bowl, using an electric mixer, cream the butter and castor sugar until light and fluffy (5-10 minutes).
4. Add the orange zest (±40ml) and mix well.
5. Add the eggs, one at a time, and combine well after each addition.
6. Mix the orange juice (±80ml), plain yogurt and vanilla and add it to the cake batter. Mix well.
7. Sift together all the dry ingredients over the cake batter and mix until just combined.
8. Divide the cake batter between the prepared cake tins and spread evenly.
9. Bake the cakes in the middle of the oven for 40-45 minutes. Remove the cakes from the oven and allow to rest for 5 minutes before loosening the sides and demoulding onto cooling racks. Allow to cool face down.
10. Once the cakes are completely cooled, cut each layer in halve to create 4 cake layers (Tip 2). Gently drip each cake layer with the orange syrup.
 
ORANGE SYRUP
1. In a medium pot, mix together all the ingredients.
2. Bring the mixture to boiling point, stirring continuously for about 5 minutes until slightly reduced and thickened.
 

CREAM CHEESE ICING (Tip 3)
1. In a medium bowl, cream the butter with an electric mixer until light, fluffy and pale (5-10 minutes). This is the most important and time-consuming step.
2. Add the icing sugar, one tablespoon at a time, until well combined and creamy.
3. Add the cream cheese, vanilla, salt and chai spice. Mix until just combined (Tip 4).
TIPS
1. If you don’t have any spices stocked up, you can place 4 chai tea bags in a bit of boiling water, about 30ml. Allow the water to infuse for about 15 minutes before removing the tea bags and adding the liquid to the cake batter.
2. To ensure an even layered cake, I weigh the cake batter in each cake tin before baking. I also use a piping bag to evenly spread the icing between the cake layers.
3. If you don’t want to flavour the cream cheese icing with chai spices, you can add the zest of an orange instead. Play around with the flavours you prefer.
4. If you’re not using the icing right away, don’t refrigerate it; the butter will firm up and it will be difficult to spread the icing onto the cakes. Keep the icing at room temperature, covered with plastic wrap.